Thursday, 13 July 2017

Country Living Stampin' Up! Stamp Set

The "Country Living" stamp set is not new, but it's new to me.  I've looked at it for a long time and it really appealed to me.  Finally, I've added it to my collection and I sure enjoyed making a few new cards with it.  I really love how this one turned out!


I used the Woodland Embossing folder on the background which is from the Eastern Palace DSP.  I wanted the trees to show more so next I coloured them in using the White Stampin' Chalk Marker.  Such fun to play and shade in the trees.

The boots were stamped in Chocolate Chip, then coloured in using the watercolour pencils and finally the blender pens to distribute the colour.  The sentiment (from Watercolor Wings stamp set) is stamped in Dapper Denim to match the card base and background colour.  Both pieces of Whisper White card stock were cut using the Stitched Shapes Framelits.

I wanted the card to have a little 'bling' so I added the Glitter Enamel Dots.  Those dots are fabulous because the are all sparkley and shaded.  

Here is my supply list...and as always clicking on any of them will take you to my online store.  Be sure to scroll down below the list to see the other two cards I made from the Country Living set.


Product List
Blender Pens
[102845]
$13.50


Couldn't resist making a couple more cards!  So much fun!


Tuesday, 11 July 2017

Stampin' Up! Pick a Pattern Suite

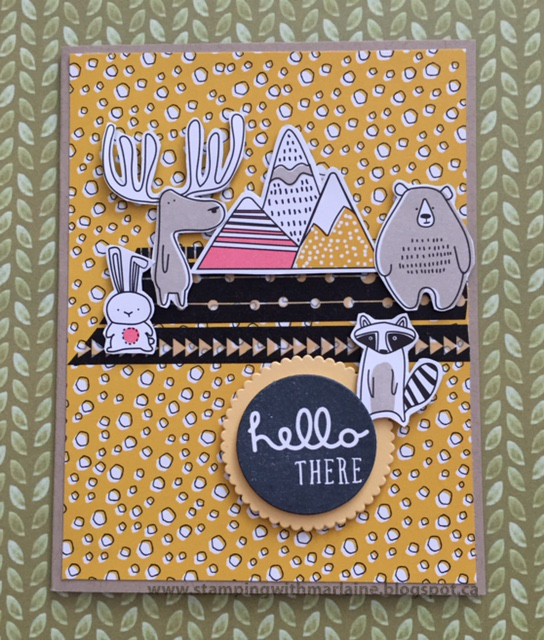
This suite was on my first order from the new 2017-2018 Catalogue.  I absolutely love it and can see endless potential for cards with it.  Here is just one:


The card is so simple and basic but the combination of the elements used make it look super (IMHO)!  The background is applied to a Crumb Cake card stock base.  I played around cutting out critters from the  Pick a Pattern DSP and in the end decided to use them all.  The more the merrier!  A few strips of washi from the Pick a Pattern Washi tape rolls and a sentiment stamped from the Pieces & Patterns stamps and it's done. It's all there on page 41 of the catalogue.  

And here are the direct links to my online for you to order anything from the suite that you need to be able to copy this card.  Please do!


Product List

Wednesday, 5 July 2017

A Walk Through Color Theory Card Pack

Curious about what comes in a card pack?  Check out this tour of the Color Theory Card Pack:


Product List

Flower Shop And More by Stampin' Up!

Today's card uses a combination of stamp sets, thinlits, a punch and DSP to create another "Double Z Fold" card.


The flowers from the Flower Shop stamp set were punched out and coloured by using the Daffodil Delight and Calypso Coral ink pads and an aqua painter.  Shading, as you can see, is possible using these tools.  The greenery came from Flourish Thinlits and the sentiment from the Dragonfly Dreams stamp set.

Everything you need to make this card is listed below.  One click on an item you need will take you to my online store.  Happy stamping!


Product List
Pansy Punch
[130698]
$21.50

Tuesday, 4 July 2017

Preparing Card Stock for a Double Z Card

Hope this video will help you in making double z cards like the one I posted below. Please share comments about it!


Monday, 3 July 2017

Double Z Card with Coffee Cafe Bundle by Stampin' Up!

I'm still enjoying playing with the Coffee Cafe bundle but this time I used it with a "double Z card".  If you haven't made one before it's simpler than it looks.  The secret is in the cutting.


Begin with an 8 1/2" x 11" card stock in the colour of your choice.  Score it on the 11" side at 2 3/4" and at 5 1/2".  Then cut it in half at 4 1/4" on the 8 1/2" side.  Cut a 1" strip from the remaining 4 1/4" piece.

I knew I was going to make a few cards so I when I cut the card stock in half, I did two more sheets of paper the same and then using a new piece scored as above. That was the piece I cut my 1" strips from.

You can go ahead and crease every piece at the score lines, folding it so that you create the "Z".  At this point, do any decorating you'd like to have on the card base, keeping in mind that you'll be attaching the 1" strip lined up to the bottom edge so you won't want anything to be hidden by it.

The 1" strip gets flipped end for end so that the 5 1/2" straight piece attaches to the front 2 3/4" piece and the other end attaches to the 5 1/2".  I used tear'n tape to attach the 1" piece.  The pieces that look like they are floating are added using clear window sheet cut to 1/4".

This is a great card to create with if you don't have a lot of supplies on hand.  Everything for this set is listed below so you'd be able to create many more cards after the first one!  Click on the items below that you need and you'll go directly to my online store.  Enjoy!


Product List


I did create two more cards at the same time.  Here they are for your inspiration:


Sunday, 2 July 2017

Cupcake Card

This card has been in my head for days.  I'm happy to have finally gotten it onto (into) paper using only Stampin' Up! supplies!


January/February Card Class Schedule

Saturday January 13, 2018 2-4pm Big Birthday Bash :   We will create four Birthday Cards suitable for anyone.   Class fee is $15 or f...